

Hey there! As a supplier of shower safety bars, I often get asked, "How long does it take to install shower safety bars?" Well, the answer isn't as straightforward as you might think. There are several factors that can influence the installation time, and I'm here to break it down for you.
Factors Affecting Installation Time
1. Type of Shower Safety Bars
First off, the type of shower safety bars you choose plays a huge role. There are different styles like adhesive - mounted bars and those that require drilling into the wall. Adhesive - mounted bars are generally quicker to install. You just need to clean the surface, peel off the backing of the adhesive, and stick the bar in place. This can usually be done in about 10 - 15 minutes, depending on how carefully you align the bar.
On the other hand, drilled - in bars take longer. You've got to measure the correct height and position, mark the spots on the wall, drill holes, insert wall anchors, and then secure the bar with screws. This process can take anywhere from 30 minutes to an hour, especially if you're a first - timer.
2. Wall Material
The material of your shower wall also matters a lot. If it's a tile wall, drilling can be a bit tricky. You need to use the right drill bit for tile, and you have to be extra careful not to crack the tiles. This may add an extra 10 - 15 minutes to the installation time compared to a drywall. Drywall is much easier to drill into, so the installation on a drywall can be completed a bit faster.
For a concrete or brick wall, the process is even more time - consuming. You'll likely need a masonry drill bit, and drilling into these hard materials can take a while. It might take an additional 20 - 30 minutes compared to a drywall installation.
3. Skill Level of the Installer
Your own experience with DIY projects can make a big difference. If you're handy with tools and have installed things on walls before, you'll probably be able to get the job done faster. You'll know how to measure accurately, use the tools properly, and troubleshoot any issues that come up.
However, if you're new to this kind of work, it might take you longer. You may need to double - check your measurements, read the installation instructions multiple times, and take extra time to make sure everything is level and secure. A novice installer could take up to twice as long as an experienced one.
Step - by - Step Installation Process and Time Estimates
Let's walk through the general installation process for drilled - in shower safety bars and estimate how long each step might take.
Step 1: Preparation (10 - 15 minutes)
Gather all the tools you'll need, such as a drill, drill bits, a level, a measuring tape, a pencil, and the wall anchors and screws that come with the bar. Read the installation instructions carefully to understand the correct height and positioning for the bar. Measure and mark the spots on the wall where you'll drill the holes. Make sure to use a level to ensure the marks are straight.
Step 2: Drilling Holes (15 - 30 minutes)
Depending on the wall material, this step can take some time. As mentioned earlier, tile, concrete, and brick walls will take longer than drywall. Use the appropriate drill bit and drill the holes at the marked spots. Be sure to drill straight and at the correct depth.
Step 3: Inserting Wall Anchors (5 - 10 minutes)
Once the holes are drilled, insert the wall anchors. This is a relatively quick step, but you need to make sure the anchors are fully seated in the holes.
Step 4: Attaching the Safety Bar (10 - 15 minutes)
Place the safety bar over the holes with the pre - drilled holes in the bar aligned with the holes in the wall. Insert the screws and tighten them using a screwdriver or a drill. Check again with a level to make sure the bar is straight.
In total, the installation of a drilled - in shower safety bar can take anywhere from 40 minutes to an hour and a half, depending on the factors we discussed earlier.
Other Related Bathroom Safety Products
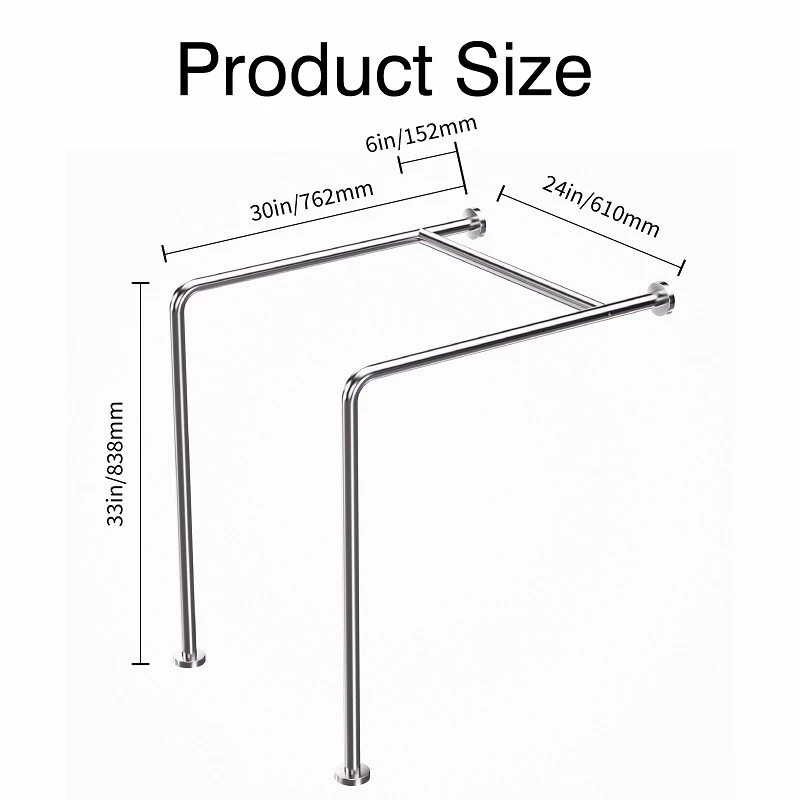
If you're concerned about safety in the bathroom, there are other products you might want to consider. For example, Grab Bars Around Toilet are great for providing support when sitting down or standing up from the toilet. These bars can be installed in a similar way to shower safety bars, and the installation time will also depend on the factors we've talked about.
Wall Hung Bathroom Rails for Toilet are another option. They offer a longer support surface and can be a great addition to a bathroom for added safety.
And don't forget about Safety Toilet Support Handle. These handles are easy to install and can provide extra stability when using the toilet.

Why Choose Our Shower Safety Bars
At our company, we offer high - quality shower safety bars that are not only durable but also easy to install. Our bars come with clear installation instructions, and we use top - notch materials to ensure they can withstand regular use. We understand that safety is your top priority, and we're committed to providing products that meet your needs.
If you're interested in purchasing our shower safety bars or any of our other bathroom safety products, we'd love to hear from you. Whether you're a homeowner looking to make your bathroom safer or a contractor working on a project, we can provide you with the right products at a great price. Contact us to start a discussion about your specific requirements, and let's work together to make your bathroom a safer place.
References
- Home Depot DIY Guides. Installation of Bathroom Safety Bars.
- Lowe's Home Improvement Blog. Tips for Installing Shower Grab Bars.